Delver’s Drop Process - Part 2: Art
The second installment in this series is coming a bit late; I blame PAX and its indie madness. This article deals with how all of the in-game art is created. At a basic level, the process can be summed up as “Draw things in Photoshop; Save; Animate where needed” but the methods of doing so are much more detailed and there are quite a few steps in the process to make it more efficient. I won’t go into the extreme details here, but hopefully you’ll get the gist of what is involved.
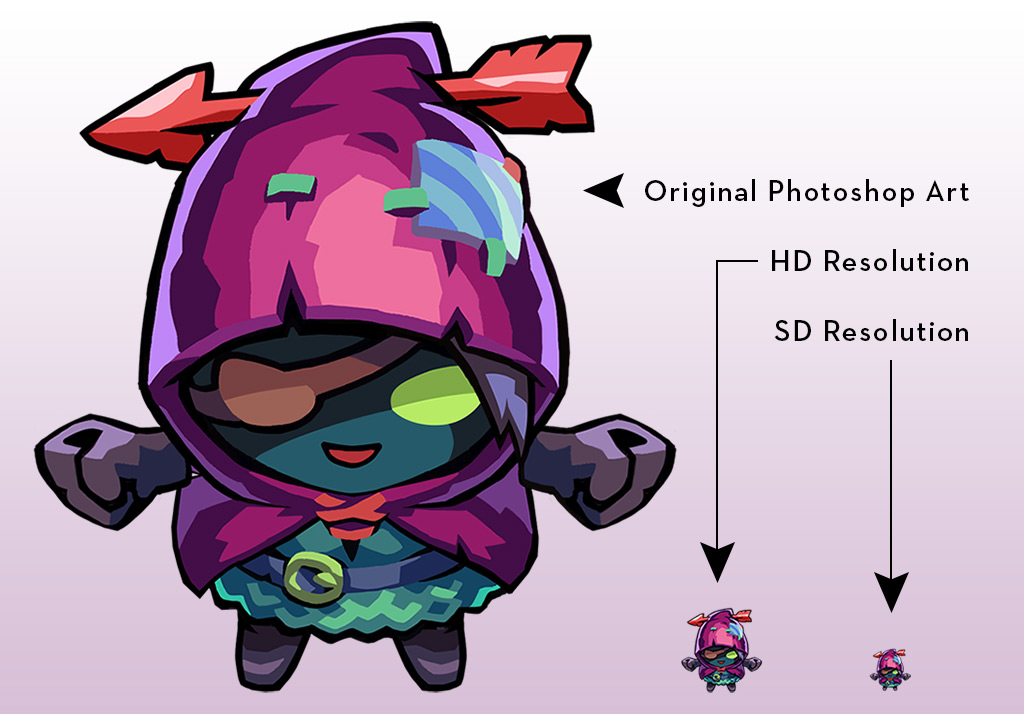
As any of you who have watched Ryan Baker’s drawing streams have probably gathered, art is originally created at a *very* high resolution — normally at least twice the size of the HD in-game assets. Part of the style of the art itself is a byproduct of the downscaling from the original art into the sizes we use for production. It’s also easier to draw and paint at higher resolutions, and has the added benefit of making the original assets print-ready. For example, take this diagram of the size comparison of the Rogue character art as it was originally made in Photoshop — at around 8x normal size — versus in-game usage:
All art production happens in 2 – 4 stages. First, the original sketches for the assets are drawn at the aforementioned massive size; this helps keep the line work style consistent and ends with a drawing that can be easily passed off to anyone for painting. Depending on the item being created, sketches may be made for one, three, four, or eight directions and/or for various visual states (whole, damaged, destroyed, etc).
Secondly, the line drawings are painted and this can often be a mini two-step process where a rough set of color swatches are painted in and then the item is passed off to another member of the team to add the final detail. If the item in question needs to be animated via separate pieces — as is the case with anything using a skeletal structure — the drawing must be dissected and painted as individual parts.
Next, the art asset(s) are scaled down to the appropriate resolution. This is typically done via a combination of basic Photoshop resizing, actions, and batch scripts. The Export Layers to Files feature is particularly useful for saving multiple files — particularly because our last step uses a tool that trims all empty space in an image by default. All images are saved out as 24-bit PNGs. Our pipeline allows us to save all assets at HD sizes which are then auto-magically downscaled further once they pass through the final step: Texture Packer.
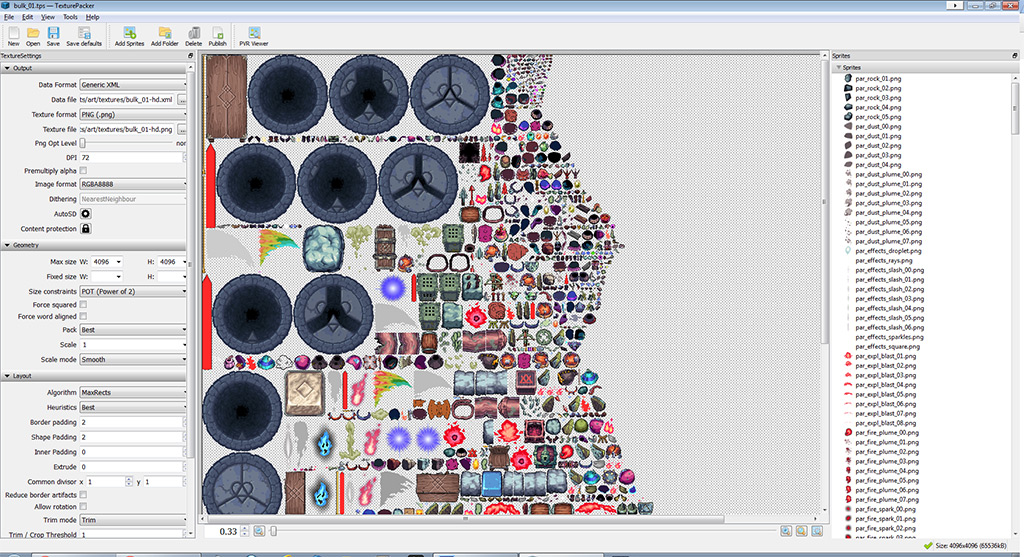
Texture Packer is a lynchpin piece in our process. All art up to this point — including items that are used in animations (which will be detailed in a separate post) — are placed into Texture Packer. This program takes all image files provided to it and condenses them into the most efficient space possible. It does have some quirks, namely its use of a “smart folder” system that automatically adds all images inside the referenced directory to the texture sheet… but will not allow you to exclude specific images within said directory if you need to. This forces us to keep only completely final in-game assets in our production folders lest temporary or testing assets be included — probably for the best.
Upon publishing, Texture Packer combines these images into a single giant PNG and creates an XML file that servers as a reference index. Our engine then uses this index to attach images to their proper objects when they are called in-game — more on how we define this in the animation and data posts that will be forthcoming. Texture Packer also automatically downscales the resulting texture sheet to half size for SD quality and creates a second XML reference file for this sheet as well. These XML files are then included in a master assets list and they are now available to be used in-game.
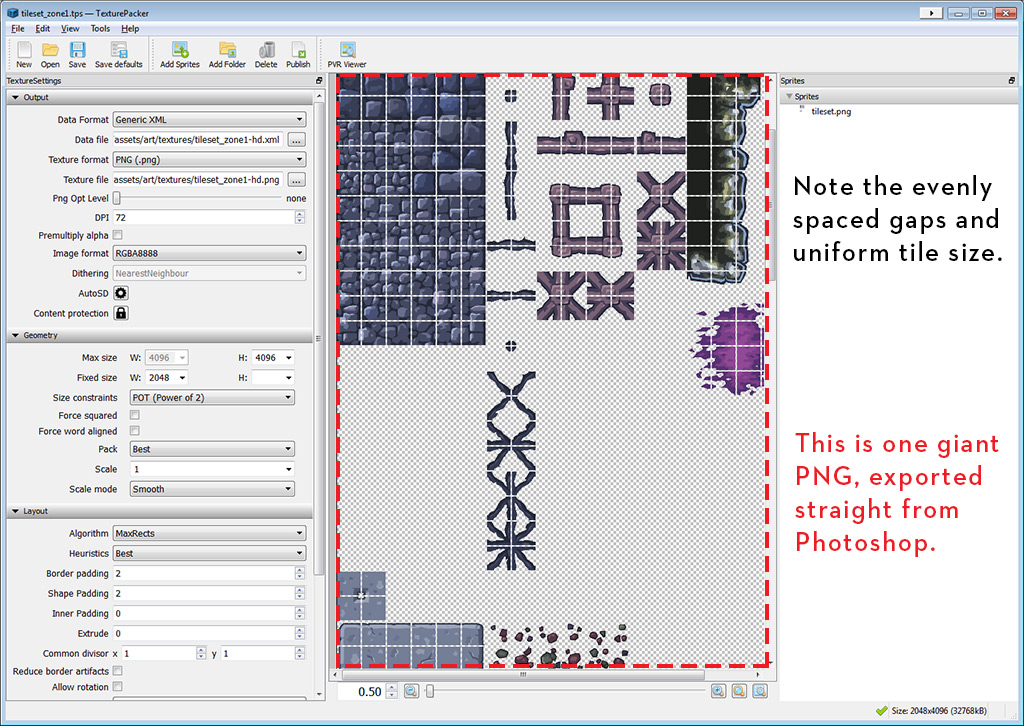
As a side note, exporting the tilesets that are used to create the floors and decorations within each room is a somewhat unique process. The program we use for painting the environments — aptly named Tiled — depends on the reference image having uniform spacing each tile; because of this we cannot use Texture Packer to export each tile image separately as it would compact them into the most efficient arrangement, destroying any uniform spacing. To compensate for this the tileset tiles are combined into a single, large PNG which is then added into Texture Packer, thus preserving the spacing.
Because the images used to build the walls and doors are referenced directly like the majority of the other game assets, these can use the default TP packing behavior.
Well, that’s it for now! Next time we’ll discuss our animation process, the wonders of Spine, and how it saved our game from being 1000gigs in size.